Thread by Jason Resnick | 💙 Email Automation
- Tweet
- Jan 18, 2022
- #Economics
Thread
These Email Opt-In Tips Helped Me Get Up To 52.1% Opt-In Rates
With email as the highest revenue channel for creators, getting people onto the list is the first step.
Here are 9 steps & 🔥 tips to build a high converting landing page in @ConvertKit 👇
With email as the highest revenue channel for creators, getting people onto the list is the first step.
Here are 9 steps & 🔥 tips to build a high converting landing page in @ConvertKit 👇
A common conversion rate for an email opt-in landing page is between 5% and 15%.
After testing and optimizing companies tend to convert at around 20-25%.
But the elite achieves conversion rates of 30% or higher.
💪 Let's rise to the top...
After testing and optimizing companies tend to convert at around 20-25%.
But the elite achieves conversion rates of 30% or higher.
💪 Let's rise to the top...
Step 1: Create the Page
- Click Grow > Landing Pages & Forms
- Click +Create New button
- Click Landing Page
ConvertKit has plenty of beautiful templates to choose from, for this tutorial I selected Fremont.
- Click Grow > Landing Pages & Forms
- Click +Create New button
- Click Landing Page
ConvertKit has plenty of beautiful templates to choose from, for this tutorial I selected Fremont.
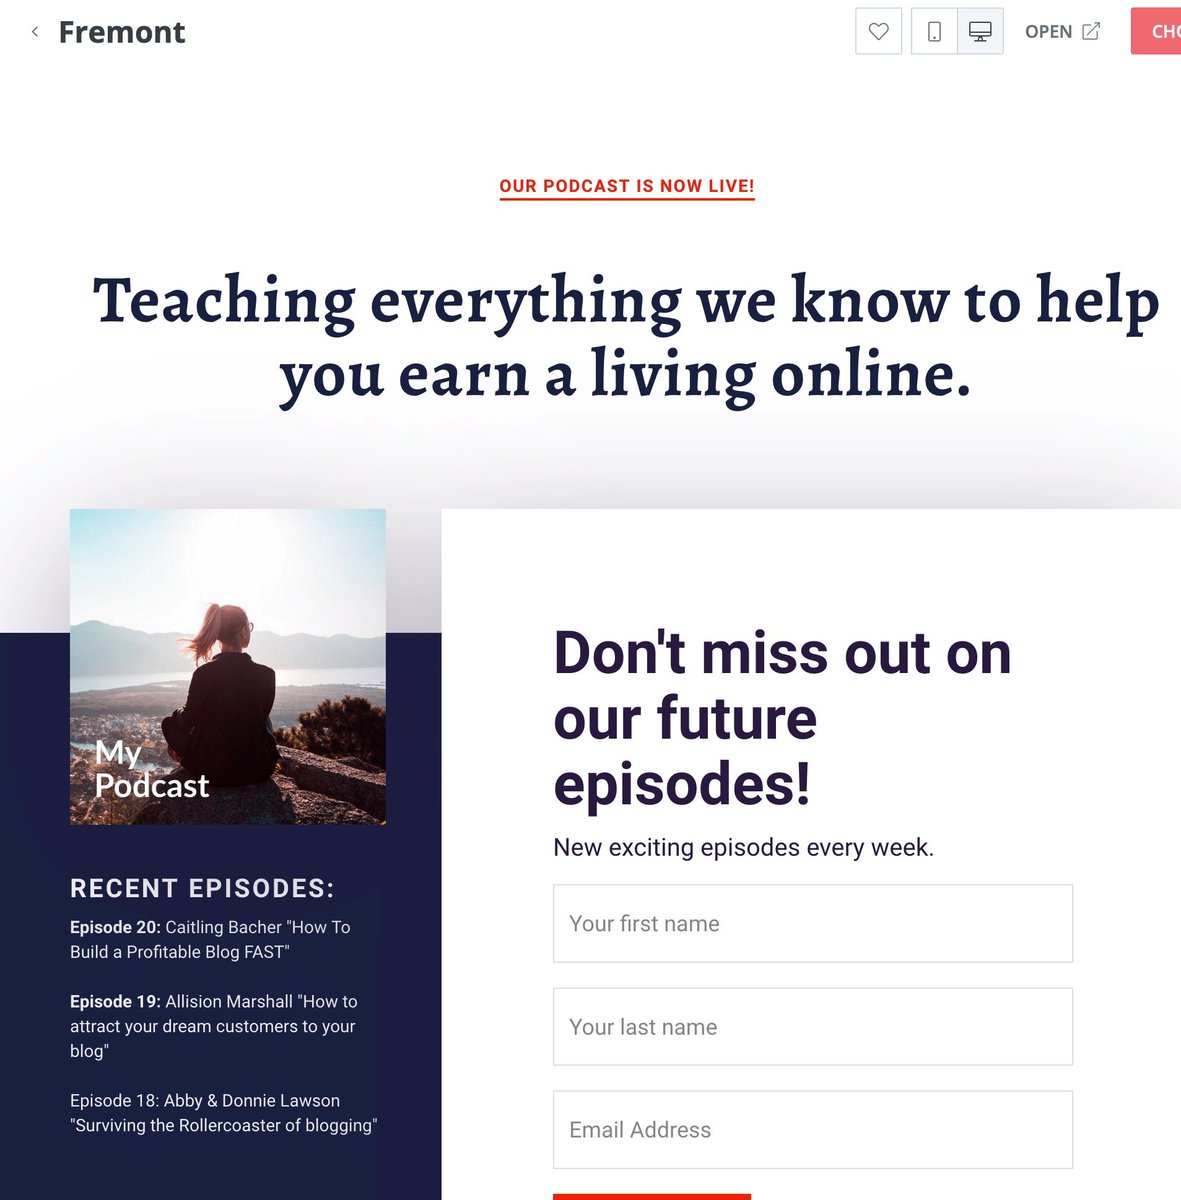
Step 2: Headline + Sub-headline
- Put the cursor in the headline
- Choose colors and fonts in the right-sidebar
- Use the headline to draw the attention + show why your newsletter is for them
- Use the sub-headline to deepen the benefit
🔥 🎬 [benefit] for [reader] to [desire]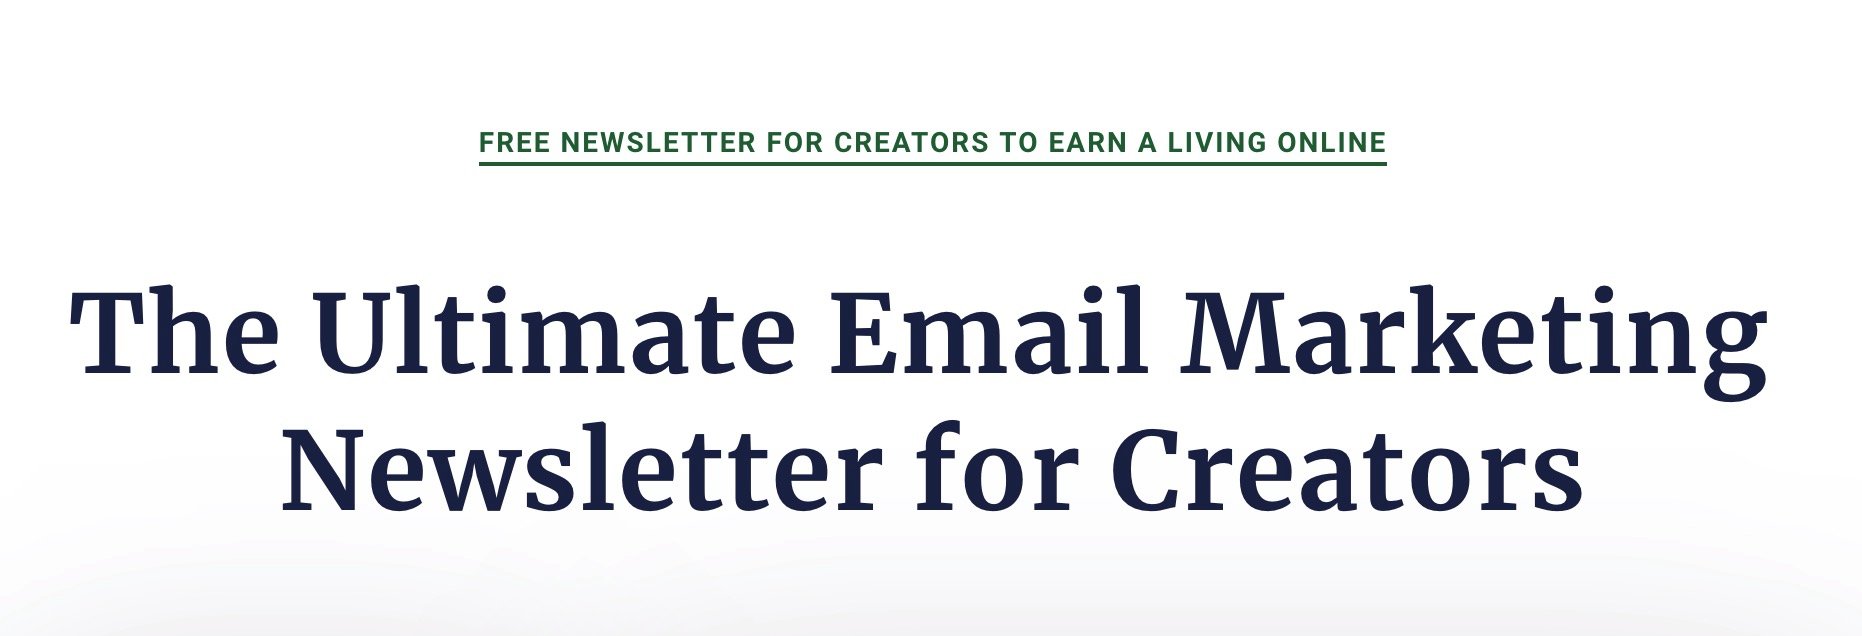
- Put the cursor in the headline
- Choose colors and fonts in the right-sidebar
- Use the headline to draw the attention + show why your newsletter is for them
- Use the sub-headline to deepen the benefit
🔥 🎬 [benefit] for [reader] to [desire]

Step 3: Set Expectations
Edit Content to:
- Reinforce the reader's desire
- Show email frequency
- Show the kinds of emails
- Tell visitor exactly what to do to signup
Focus on the reader and not you.
It's highly likely they know you already and want more from you.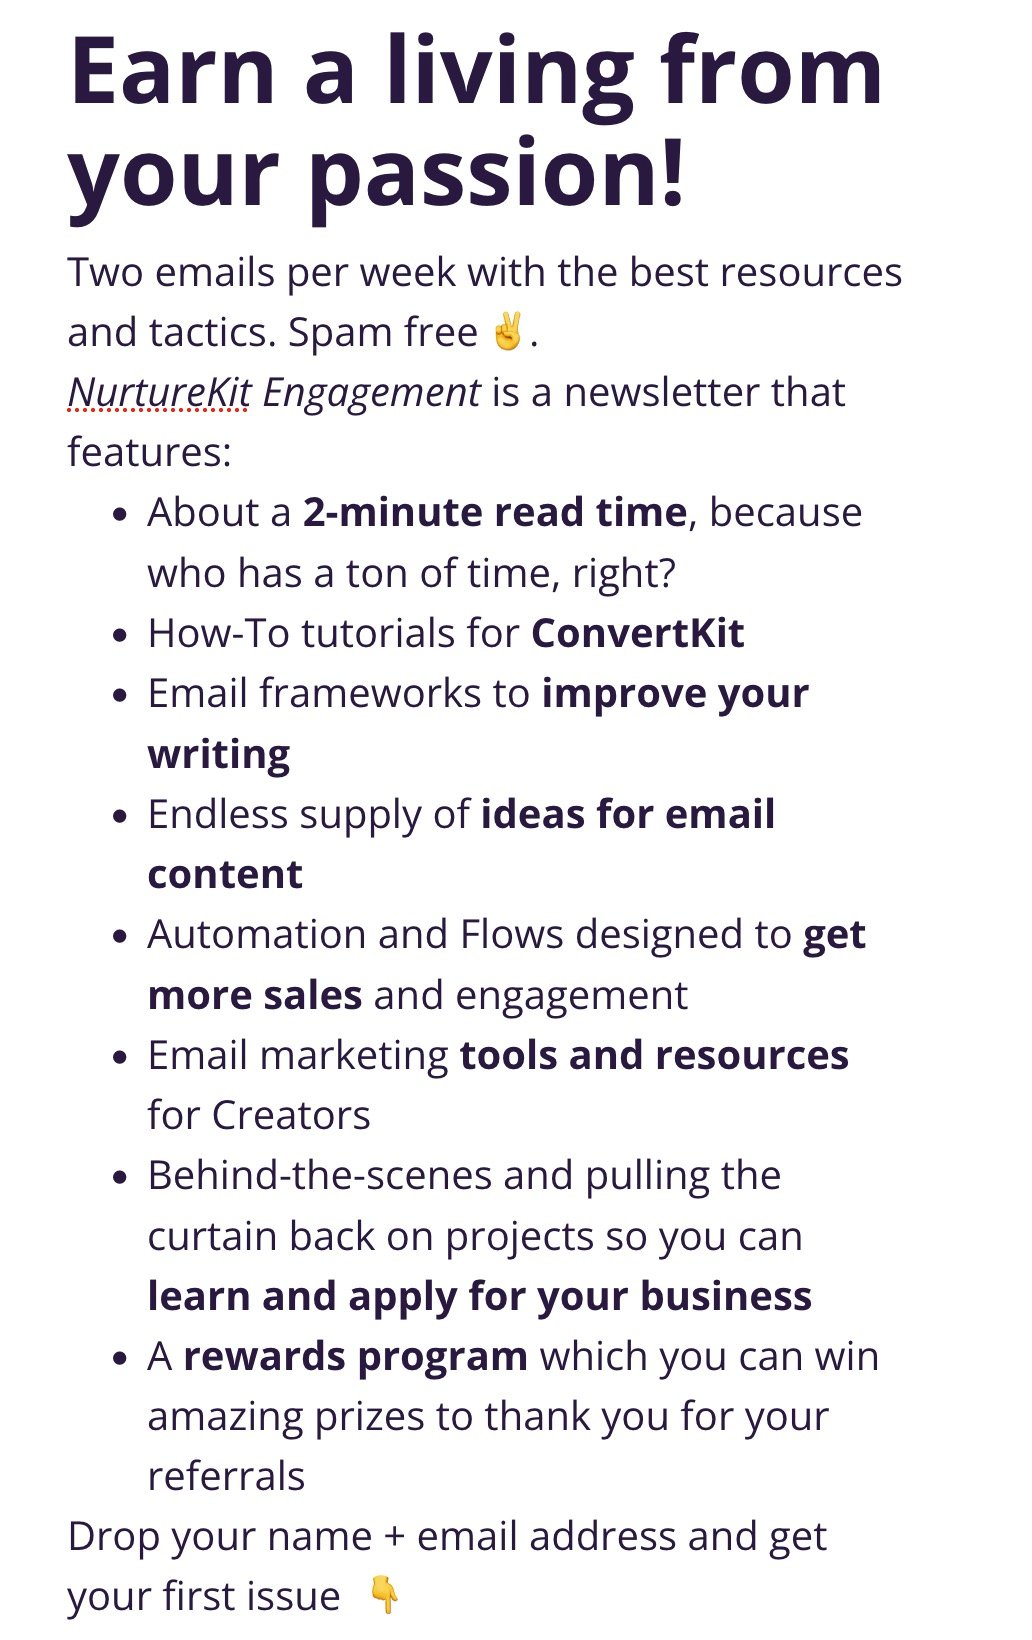
Edit Content to:
- Reinforce the reader's desire
- Show email frequency
- Show the kinds of emails
- Tell visitor exactly what to do to signup
Focus on the reader and not you.
It's highly likely they know you already and want more from you.

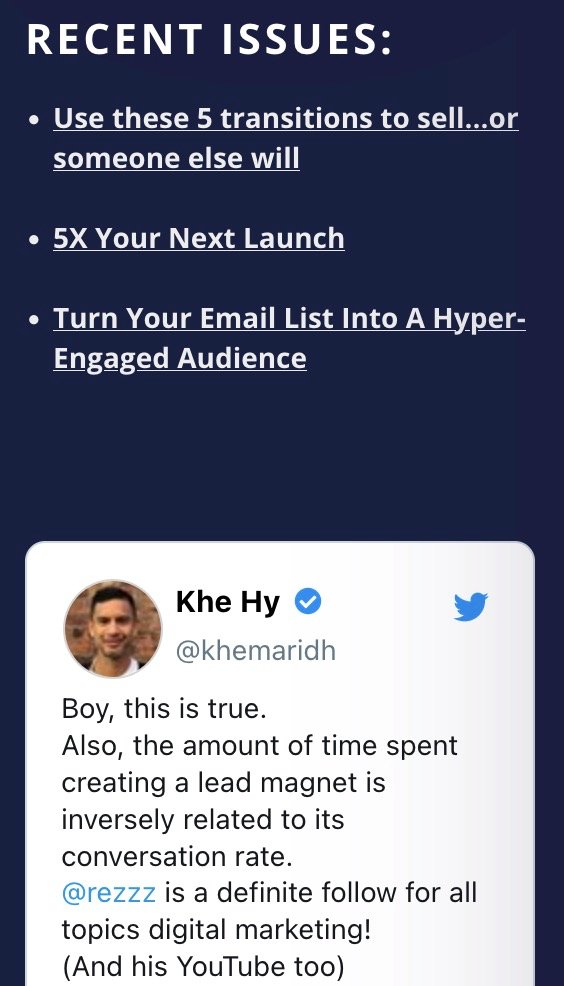
Step 4: Add Social Proof
- @ConvertKit makes embedding easy, just paste in Twitter links
- Add testimonials/replies from readers
- Add in a sample email (click Share to get archive URL)
- Use @SparkLoopHQ Proof to automatically update the number of subscribers on your list

- @ConvertKit makes embedding easy, just paste in Twitter links
- Add testimonials/replies from readers
- Add in a sample email (click Share to get archive URL)
- Use @SparkLoopHQ Proof to automatically update the number of subscribers on your list
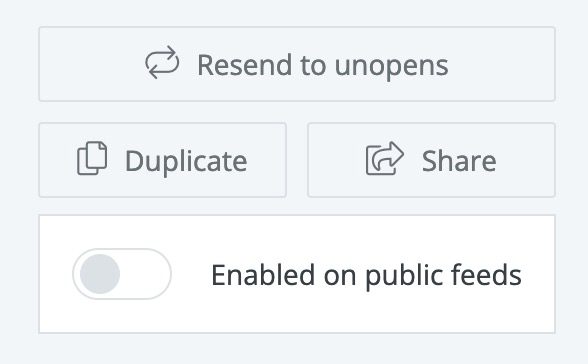
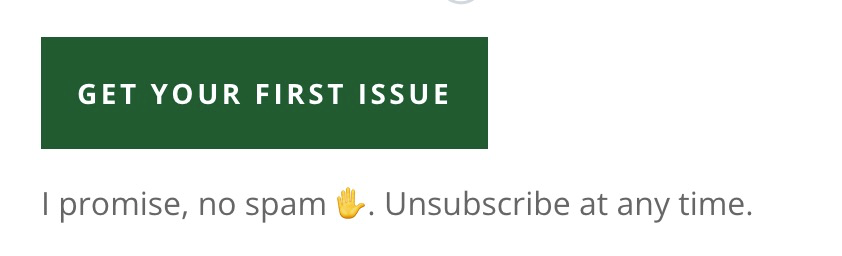
Step 5: Change the Button
No one wants to "Subscribe" to anything.
Change the text to what happens after the click.
- Click the button and change the text
- On the right sidebar, change the colors to match your brand
- Ensure their trust with you below the button
No one wants to "Subscribe" to anything.
Change the text to what happens after the click.
- Click the button and change the text
- On the right sidebar, change the colors to match your brand
- Ensure their trust with you below the button
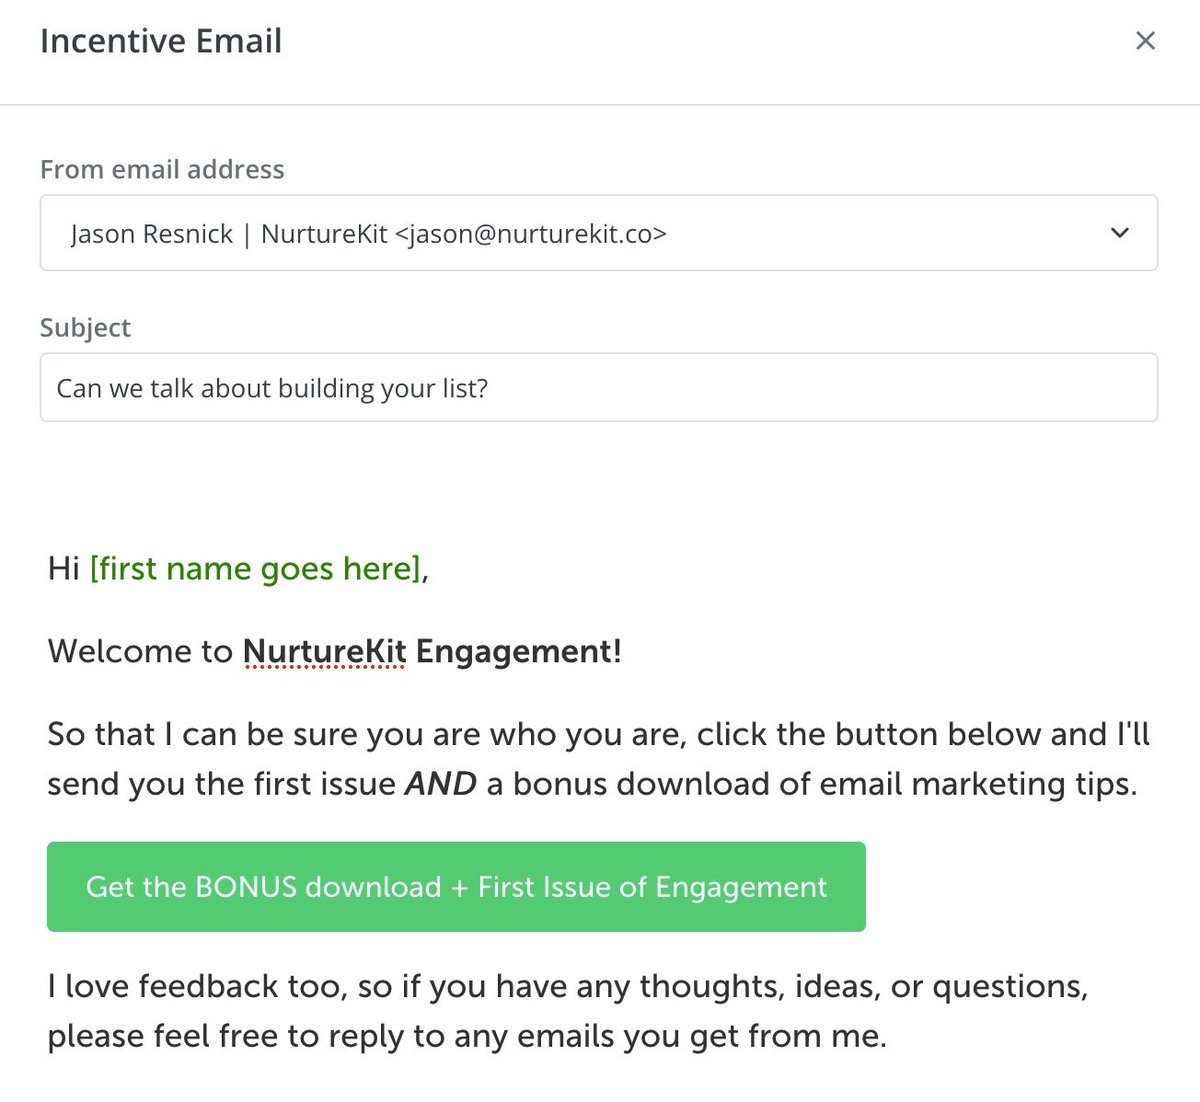
Step 6: Auto-responder / Incentive Email
This is your subscriber's confirmation email.
- Click Settings > Incentive
- Click Edit Email Contents
- Change the Subject
- Change the Content
- Change the button and color
- Click Save
Don't close this screen yet ...
This is your subscriber's confirmation email.
- Click Settings > Incentive
- Click Edit Email Contents
- Change the Subject
- Change the Content
- Change the button and color
- Click Save
Don't close this screen yet ...
Step 7: Link the Button
When someone clicks on the button, they will be redirected.
Don't leave it as the default.
- Change "After confirming redirect to:" a page on your website or a download
- Click Upload a file or
- Paste in a URL to a page on your website
When someone clicks on the button, they will be redirected.
Don't leave it as the default.
- Change "After confirming redirect to:" a page on your website or a download
- Click Upload a file or
- Paste in a URL to a page on your website

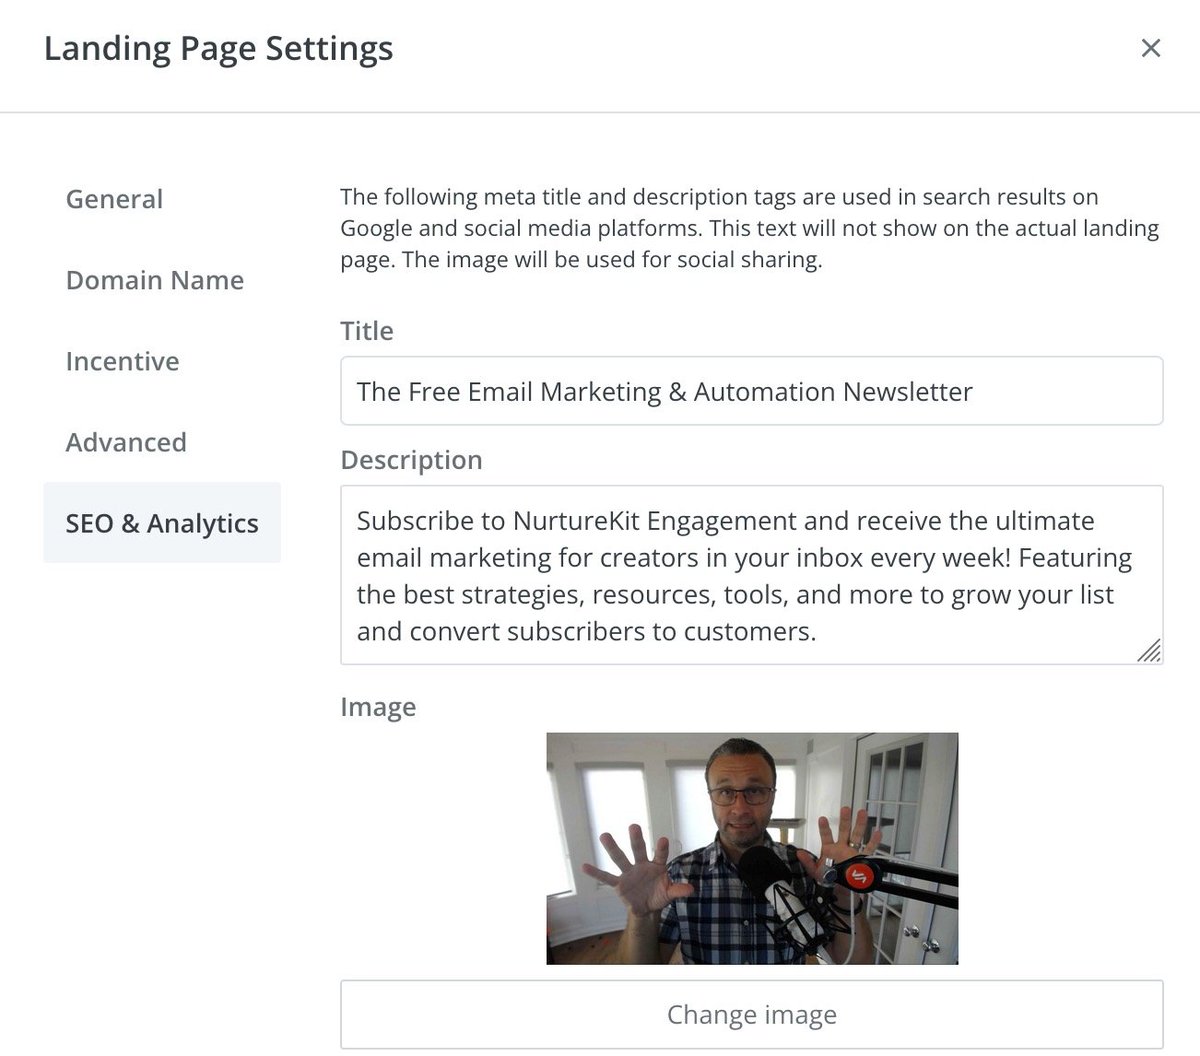
Step 8: Optimize Metadata
🔥 IMPORTANT For Sharing
- Click Settings > SEO & Analytics
- Make the title, description, and image grab your reader.
- Add a call to action in your meta description inviting users to subscribe
Use this free tool to check -> metatags.io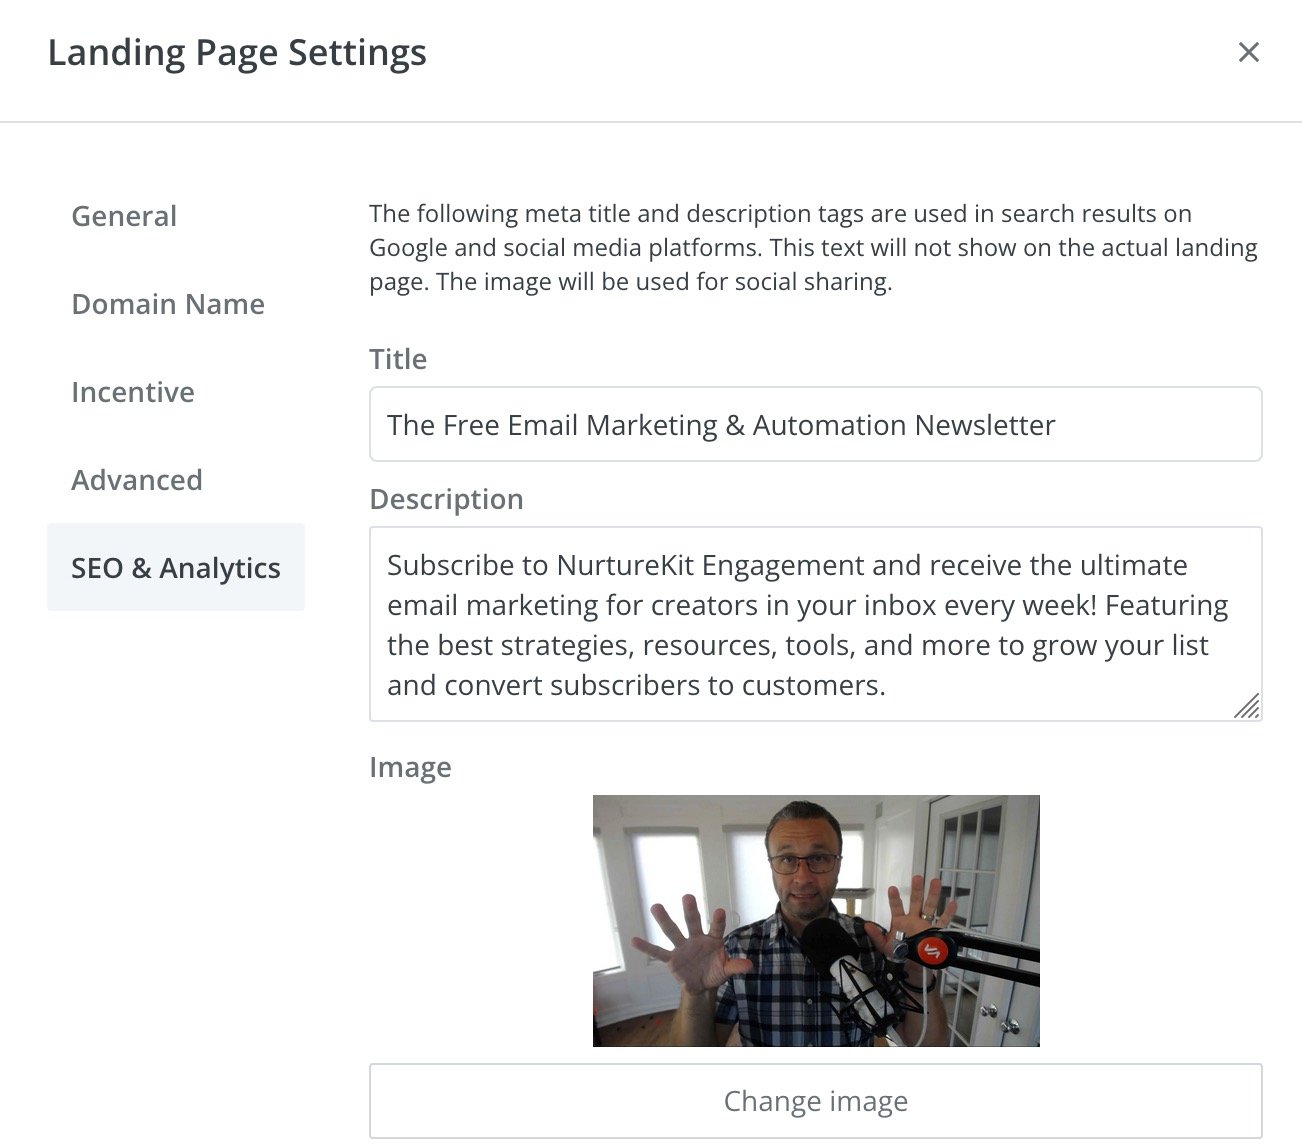
🔥 IMPORTANT For Sharing
- Click Settings > SEO & Analytics
- Make the title, description, and image grab your reader.
- Add a call to action in your meta description inviting users to subscribe
Use this free tool to check -> metatags.io
Step 9: Launch & Share
- Click Save
- Click Publish
- Copy the URL and put it onto your social profiles and share it with everyone
If you have WordPress, download the plugin wordpress.org/plugins/convertkit/ so you can select this Landing Page on any page and get it under your domain.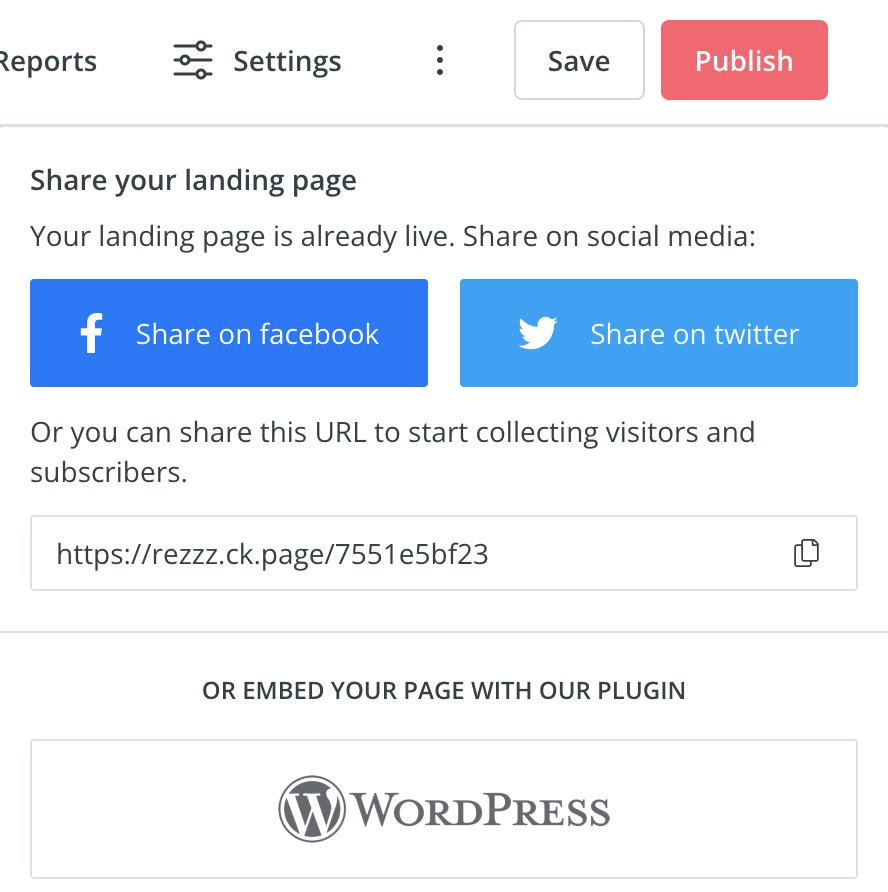
- Click Save
- Click Publish
- Copy the URL and put it onto your social profiles and share it with everyone
If you have WordPress, download the plugin wordpress.org/plugins/convertkit/ so you can select this Landing Page on any page and get it under your domain.

Save this so you can improve your next landing page.
These threads take time to put together and are what I do for clients, but sharing them with you for FREE.
All I ask is that you RT the original tweet so it helps others.
Thank you 🙏🏼🤘🏼
These threads take time to put together and are what I do for clients, but sharing them with you for FREE.
All I ask is that you RT the original tweet so it helps others.
Thank you 🙏🏼🤘🏼